Vintage Marantz WC-22 walnut cabinet, AKA Marantz WC-22 wood case – A helpful guide.
Finding, model variations, compatibility, care and step by step instructions for installing your Marantz receiver into a WC-22.
Our vintage HiFi journey began in 1976 – when today’s vintage HiFi was contemporary. As a wide eyed twelve-year-old visiting (as often as possible) the local HiFi shops to ogle at Marantz, Sansui, Pioneer and Luxman gear. Budget realities resulted in the purchase of a Sanyo Amplifier. However, an oath was made, and honoured. Fast forward decades later, we have the good fortune of acquiring multiple pieces of vintage HiFi gear on a monthly basis – comparing, testing and loving. Patience truly is a virtue.
We’re now committed to sharing our love and learning of vintage HiFi.
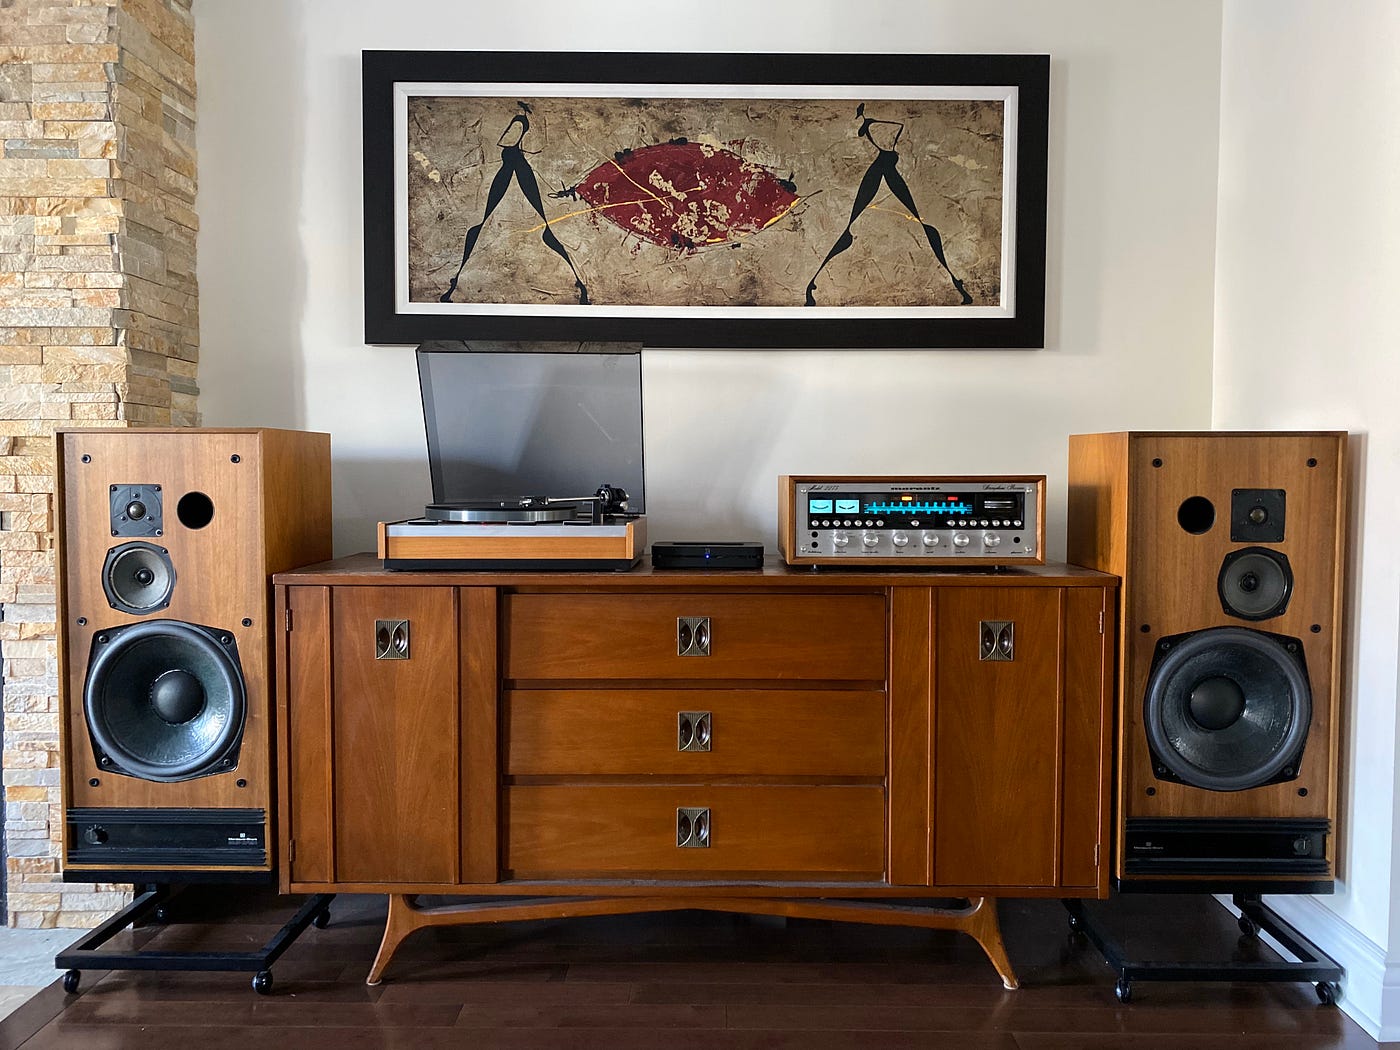
Marantz receivers from the 70’s continue to have a strong following amongst vintage HiFi lovers. The glow of the lights mixed with a smooth deep sound have an undeniable vintage charm. While modern HiFi continues to shrinks in size – speakers disappear into ceilings, 70’s HiFi gear was all about making a statement – massive in size, impossible to miss, it didn’t lurk in a rack in the corner – it was a centrepiece in the room, and often perceived as a prized piece of “furniture.”
When a buyer purchased their Marantz in the 70’s they had a premium option to consider. This option transformed an already massive receiver into an even more imposing statement piece for the living room. The WC-22, walnut cabinet, or wood case. While there are multiple models of Marantz wood cabinets for amplifiers, pre-amps, tuners, tapedecks…this article is focused on the most popular – the WC-22 which fit the 22XX and 22XXB Series receivers.
Finding an original vintage WC-22
Finding a vintage Marantz WC-22 is not easy – there is no official public count of WC-22’s sold as an “attached” option when someone purchased a new Marantz 22XX series receiver – but there is ample speculation and “guesstimates” the number is in the 10% range. Based on our experience researching and buying vintage receivers – this number would seem reasonable. This takes into consideration that significantly more original series 22XX appear to have a WC-22 and very few 22XXB models have the WC-22 case option. As the design of the 22XXB models, 1977/78 – 1980 were more “modern” in style – (full silver face and black metal top case) – fewer buyers opted for the wood cabinet which was perceived as dated nearing the end of the decade. Important to note that Marantz did introduce a more “modern” interpretation of the WC-22 – it was a three-piece bolt-on wood sides and top cover, the model WC-122, that looked more “streamlined” less imposing than the WC-22. The WC-122 are featured in the Marantz 1978 catalogue encasing the B series receivers.


Considering that only a small ratio of original purchased vintage Marantz receivers were purchased with WC-22 wood cabinets– they are obviously very difficult to find. Furthermore, “survival” rates are reduced even more by other factors; some owners overtime removed the WC-22 and kept the receivers with the metal top covers as styles evolved in the late 70’s, 80’s to more “modern looks”, damaged cases, broken units never repaired, discarded cabinets. Surviving receivers, often ended up sitting dusty in media units, or in storage boxes in attics or basements for years…decades. Eventually some triggering event moves these items into the open market.
So where do you find one? There are multiple online social / selling market places — but we find one online aggregator for used hifi gear and accessories is a tremendous help for finding WC-22s for sale; WWW.hifishark.com. It’s important to note it does not aggregate/list items for sale in Facebook marketplace which has become a major source of vintage gear listings in last few years.
Typically when the case is sold on its own it will sell for $175-$250 in original 8/10 or better condition. More often than not, a case sold on its own, will likely be sold by a vintage collector or reseller.
Another option is to purchase a vintage Marantz receiver that has a WC-22— you can easily strip out the receiver — and if you have the original metal case top and bottom cover, you can sell the receiver to recoup a portion (or all) of your expense. Some of our nicest wood cases have come from the purchase of broken receivers — but they frequently had great condition cabinets.
Buyer checklist – Top five:
- Overall physical condition, pay particular attention to corners where most damage occurs
- Top cabinet scratches and gouges will be very difficult to sand out, as the real wood veneer is very thin (more on this topic later)
- Metal grill condition and does it “sag” in the rear. It’s difficult, not impossible, to straighten, as the metal grill as a “memory” that returns to the sagging position. Aftermarket grills can be purchased.
- Original fixtures – cabinet feet, screws to fasten receiver into the WC-22
- Any signs of obvious repair. Stay away from units that have been painted, unless of course you wish to repaint it yourself. Original WC-22 colours/tint vary from pale to darker variation is normal — sometimes fading occurs from “sun-staining”. A simple clue that a cabinet has not been revarnished, look for the original “warning do not open…” label on the top cover near the grill.
Finally, while we will ever endorse buying a vintage receiver and having it shipped – a very well packed WC-22 can be shipped with virtually no concern of damage in transit.
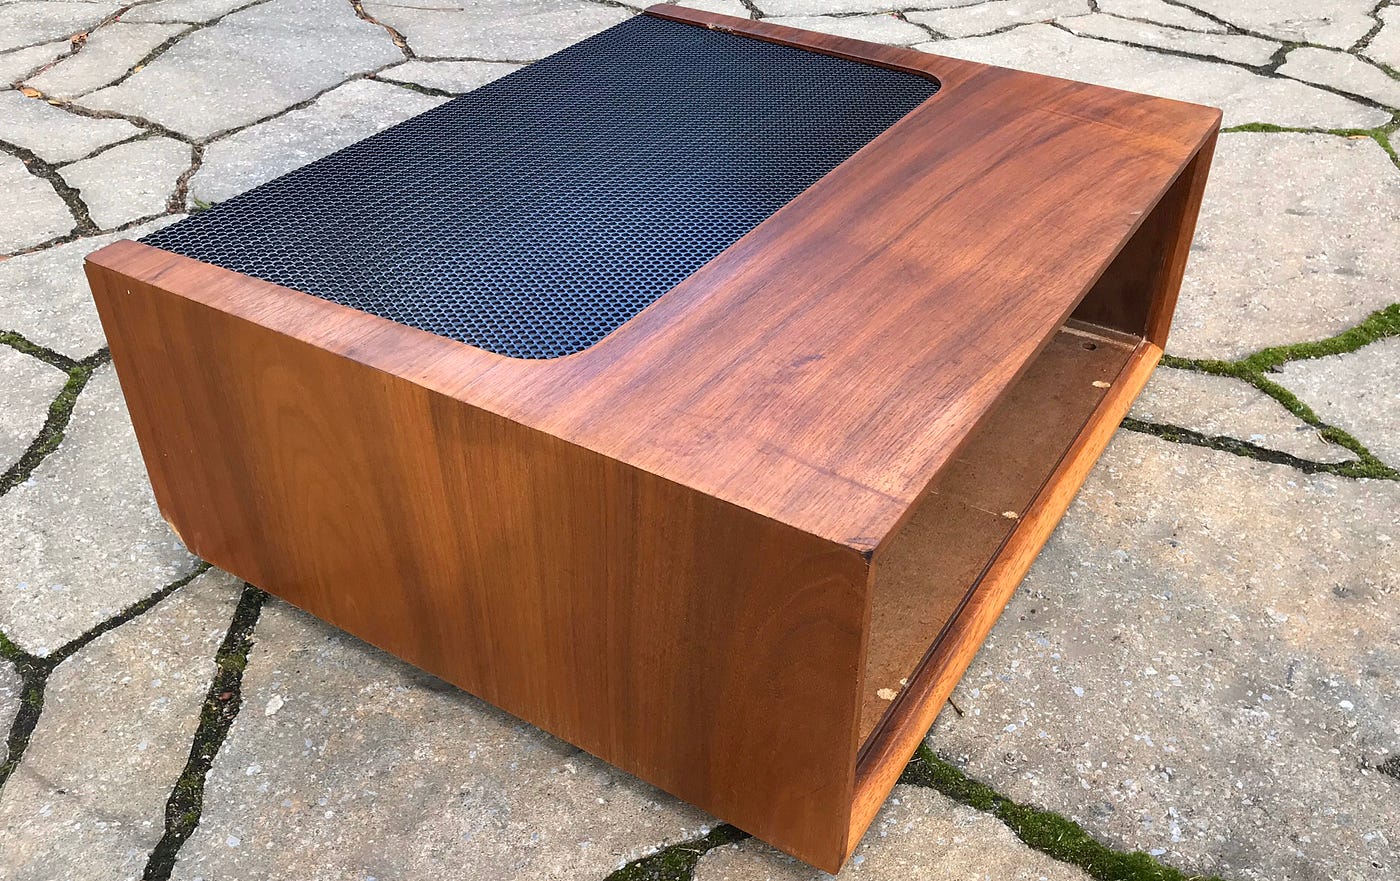
Marantz WC-22 – model variations
Not all WC-22 are the same, build quality varies. While the model number remained unchanged during the period of manufacturing 1971 – approximately 1977, there are several variations of the WC-22.

The variations include:
- Different shades of walnut veneer. From light, almost pine colour, through darker walnut. Because real wood veneer was used, there are major variations of wood grain, some are quite spectacular, and some simply normal.
- Structure: the earliest models have a wood brace across the rear of the cabinet to support the black metal grill. This makes a major difference in overall structural integrity, and eliminated any sagging of the grill if other components were stacked on-top.
- The number and placement of holes in bottom of the cabinet for fastening the receiver to the cabinet. Four is standard, one per receiver “threaded foot hole” and some older models have six total, the additional two holes are designed to fasten the main central body to the cabinet and they are located inline with two rear threaded foot holes.
- Location of holes for fastening vary. While the cabinet physically is the same overall design — the depth of the receiver varies by model. Lower watt models, ie. 2220 are not as deep as 2270 models, so “threaded foot holes” will not always align with the “threaded foot holes” of the receiver. (more on this topic in the installation section)
- The norm for wood cabinet feet are plastic feet that resemble the receiver feet – but we’ve seen pin cushion feet as well
Vintage Marantz Model fit/compatibility with the WC-22.
The short answer here is simple. ALL 22XX and 22XXB model receivers fit into the WC-22. All models. Additionally, Marantz Quad Receivers 4220,4240 and 4270 will fit the WC-22 Wood Cabinet.
If you google search you will find hundreds of conflicting responses from people – yet few have actual experience fitting multiple different receivers into WC-22 cabinets. An early frustration we felt as vintage Marantz collectors, was trying to understand model compatibility with the WC-22, which was the motivation for writing this article.
So the compatible list is as follows:
Marantz 2215, Marantz 2215B, Marantz 2216, Marantz 2216B, Marantz 2220, Marantz 2220B, Marantz 2225, Marantz 2226, Marantz 2226B, Marantz 2230, Marantz 2230B, Marantz 2235, Marantz 2235B, Marantz 2238, Marantz 2238B, Marantz 2240, Marantz 2240B, Marantz 2245, Marantz 2250, Marantz 2250B, Marantz 2252, Marantz 2252B, Marantz 2265, Marantz 2265B, Marantz 2270, Marantz 2275, Marantz 2285, Marantz 2285B, Marantz 4220, Marantz 4230, Marantz 4240, Marantz 4270


Notes on compatibility/including variation impacts.
- The cabinets are designed to be universal for the models listed. While the faceplate will line up properly in the front, the depth receiver towards the rear inside the cabinet will vary – but that remains hidden from view
- The bottom-front most screws holes to fasten the receiver to the cabinet in will always properly align with front “feet threaded screw holes”
- The rear screw holes frequently do not align and do vary between models — while some people modify the WC-22 to accommodate rear “threaded foot screw holes” we simply only use the front bottom screws which we feel is sufficient if you’re cautious when transporting the receiver
- As mentioned prior in model variations — our oldest wood cabinet is from 1971, earliest model, and has six fastening screws. One per “foot” and two more inline with the rear feet threaded holes, central main body.
WC-22 restore and care
The likelihood of you finding a pristine condition WC-22 is not very high. The vast majority have some wear and tear, surface scratches — these marks if not too severe build the character of the cabinet.
If there is serious damage to the cabinet — it could need structural repair and new veneer — this is another topic completely, and as a buyer you need to consider how much effort, or investment you’re prepared to make vs. walk away and look for the next WC-22 that comes your way. As a rule, we only buy WC-22 cabinets that are 7/10, or better condition.
The instructions below will help diminish visible nicks and scratches that are more visible when the cabinet veneer is dull. It helps bring back a natural look of the wood without any shine.


Restore instructions:
- Remove the receiver from the WC-22.
- Use a lightly damp cloth (not wet) with a large bowl warm water and couple of drops of dishwashing soap. This removes any dust and grime from years of sitting in a room.
- Dry immediately with a dry cloth.
- If the WC-22 requires light sanding — use a very fine grit sandpaper, (220) and small block and sand very gently following the direction of the grain. The veneer is VERY VERY thin. You will not be able to “even the surface down” to eliminate a gouge, or remove a sunlight stain area. Any deep sanding will simply wear through the veneer, this requiring new veneer.
- Use Howard’s Feed-N-Wax, available from Amazon. Follow instructions on the bottle.
These steps have always helped us restore the beautiful natural wood colour and grain detail of a previously aged and dull looking cabinet.
Installing your Marantz receiver into a WC-22
Having personally installed the following Marantz receivers (2220, 2226B, 2230, 2235B, 2240, 2245, 2252B, 2265B, 2275B, 2285B) into WC-22 wood cabinets, we have some tips that can help you get it done smoothly.
IMPORTANT NOTES:
Read the owners-manual and warnings on the receiver related to handling electronic equipment – there are always risks of electric shock from any electronics equipment – even after they are unplugged. Ensure you have the proper tools. We are not responsible for any injuries or damage caused by following these suggested instructions – continue at your own risk.
While you can complete most steps alone. Fastening the cabinet will require two people for safety purposes.
Tools required – some cabinets use bolts to fasten the receiver to the base and use screws for the feet. So, you will need a Phillips screwdriver and possibly a socket wrench. You will also need a flashlight. You should also have on hand bowls or cups to place screws.
Parts required – you will need the original screws / bolts to fasten the receiver to the cabinet.
Work area – You will need a large work bench or surface that is smooth – but warning the work surface can be scratched by the receiver frame during this installation. (Don’t do this on your dining room table).
We assume at this stage that your WC-22 is ready for the receiver, (see care instructions) and has the original feet installed already. Do NOT install a receiver into a WC-22 that doesn’t have feet – it will overheat.
Verify the bolts/screws that you are using are the appropriate length. Unless your purchased your Marantz receiver from the original owner with a WC-22 already installed (and are using these instructions to reinstall with the same fasteners) don’t assume the screws and bolts are compatible in length. Bolts or screws that are too long can damage internal parts of the receiver.
To test the length that the fasteners protrude into the receiver Place the WC-22 on its side on a clean surface that won’t scratch the cabinet. Insert the fastening screws into holes with the original washers to identify how far they will protrude into the receiver. From our experience you do not want the screws/bolts to go beyond 1/8–1/16 of an inch or they may impact sensitive components of the receiver causing damage. You can use aftermarket compatible size washers to limit how far the screws into the bottom case of the receiver.

Steps
- You need to ensure the power cord does not snag or get into the way when inserting the receiver into the cabinet. We roll/coil-up the power cord tightly and fasten it together with a tie-wrap. We then plug the power cord into the switched or un-switched (either is fine) outlets on the back of the receiver.
- Remove top cover (read warnings). Some receivers will fit into the WC-22 with the cover, but most will not. We recommend that you remove the cover on all receivers when installing
- Place the receiver on its side (either side is fine). Ensure surface is clean, and will not scratch the side of the faceplate
- Remove receiver feet
- Optional — if you’re model WC-22 has extra holes in center area of base of the cabinet to fasten the WC-22 then you must remove the related screws from the base of the receiver. TIP: you can remove the bottom cover of the receiver and slide it into the WC-22 to see which screw holes align.
- Optional – some people remove the bottom cover – believing that the receiver will not operate cooler with it removed. We leave this to your discretion. We always leave the bottom case in place.
- Lay the receiver down flat in its normal position (now without the feet)
- Place the WC-22 behind the receiver, aligned with receiver. The receiver will slide in from the front.
- Don’t rush this step as this is where there is the greatest risk of scratching the WC-22 cabinet if you don’t do it slowly. We recommend two people for the next steps
- Gently lift the receiver and begin sliding it into the WC-22. The second person/helper can ensure the power cord is not in the way and can help guide the receiver into the WC-22 cabinet. The screws that hold the bottom cover in place can and will scratch the bottom inside of the WC-22, but that is normal and will not be visible. Take extra care to guide it is slowly to not scratch the front facade of the WC-22. This is a delicate procedure and be careful of NOT supporting the weight of the receiver by holding the AM antenna – it will break off.
- Once the receiver is fully inserted into the WC-22 the faceplate will be flush and centred. There should not be any gaps.
Next phase fastening the receiver to the WC-22
We don’t know how the WC-22 cabinets were originally installed in the 1970’s so the instructions below are based on our improvisation and experimenting multiple different ways. Sadly, some of these experiments resulted in damaged WC-22 cabinets. We have tried installing and fastening with the receiver on its back, on its side… neither has worked reliably.
The steps outlined below are the most reliable way we have found. For your own safety, you will need two people for this step. The receiver will be overhanging the work bench and could fall on you if it is not held in place by the second person.
- Place the WC-22 (with receiver now inside) at the edge of the work-table
- With one strong person firmly holding the WC-22 and the receiver inside – gently “overhang” the receiver off the table so the front screw holes are visible from below.
- From below the second person will align the foot threaded screw holes with the WC-22 holes. A flashlight will help you see when the holes are aligned. You may need to gently nudge the receiver left and right or forward, backwards within the WC-22 to align. Install the appropriate screws /washers into the front two holes. These always align, regardless of receive model and WC-22 model. Important Reminder that the screw length should have been tested prior to this step.
- Now overhang the rear of the receiver off the edge of the work table so the rear foot holes are visible from below. Again, one person should hold the receiver while the second person aligns and fastens the cabinet in place with screws. If the holes do not align, you have the option of creating holes — but as mentioned earlier, if only the two front holes are aligned, we believe this is sufficient. To state the obvious – if you create new holes in the WC-22, remove the receiver first.
- If there are two additional rear inline center holes and they align — you can use these to fasten the rear of the cabinet. Using the same technic described above in point 4.
- Last important point. Store the removed top metal cover (and bottom if you chose to remove) with screws somewhere safe. you may wish to use the case on another receiver in the future. Also, whenever we bring a receiver to a technician for service — we always remove the wood cabinet and replace it with the original metal case.
We hope this guide has been helpful resource. Please share the story to help others on their Vintage HiFi journey.
Follow us on Twitter: @hifisetup for vintage HiFi reviews.
Copyright 2020, Mark Scott, HiFiSetup
